


Introduction
Painting a ceiling can feel like a daunting task, but with the right techniques and tools, you can achieve a flawless, streak-free finish. Proper preparation and technique are key to ensuring the paint adheres smoothly and evenly, leaving your ceiling looking fresh and professional. In this guide, we’ll take you step by step through how to paint a ceiling, ensuring an even and beautiful finish with no streaks or drips.
Surface Preparation is the most important step when painting. If avoided, it can affect the whole outcome of your project. Surfaces must be prepared correctly for the paint to adhere and bond to the surfaces. Poor preparation will result in peeling and flaking, resulting in premature failure of the paint. Good preparation will give you a very long-lasting paint performance.
Step 1: Gather Your Materials
Before starting, ensure you have the following tools and materials:
- InsOpaint Ultra: Provides insulating benefits and helps regulate temperature on ceilings.
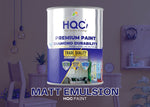
- High-quality ceiling paint: Choose a flat or matte finish for the best results (e.g., HQC Matt Emulsion).
- Extension pole for roller: To easily reach the ceiling without straining.
- Angled paint brush: For cutting in around edges and corners.
- Paint tray and liner: For easy roller loading.
- Drop cloths or plastic sheets: To protect your floors and furniture.
- Painter’s tape: To mask off walls, trim, and light fixtures.
- Stir stick: To ensure the paint is thoroughly mixed.
- Step ladder: For accessing higher areas when needed.
Step 2: Prepare the Ceiling Surface
Remove all loose and defective paint, and repair any cracks or imperfections on the ceiling. Clean and smooth out the surface for a flawless finish:
- Clean the Ceiling: Dust and debris can interfere with paint adhesion. Use a damp cloth to wipe the ceiling, removing dirt and cobwebs.
- Mask Off Edges: Use painter’s tape to protect the walls, light fixtures, and trim from paint splatters.
- Prime if Necessary: If your ceiling has stains, water marks, or an uneven texture, apply a primer. We recommend HQC Stabilising Universal Primer to ensure the surface is ready for painting.
Step 3: Cutting In the Edges
Cutting in creates clean lines around the edges of the ceiling before you use a roller on the main surface:
- Use an Angled Brush: Dip your brush into the paint, then carefully paint along the edges where the ceiling meets the walls, leaving a 2-3 inch buffer zone.
- Work in Small Sections: This will help prevent the paint from drying too quickly before you roll over it, ensuring an even finish.
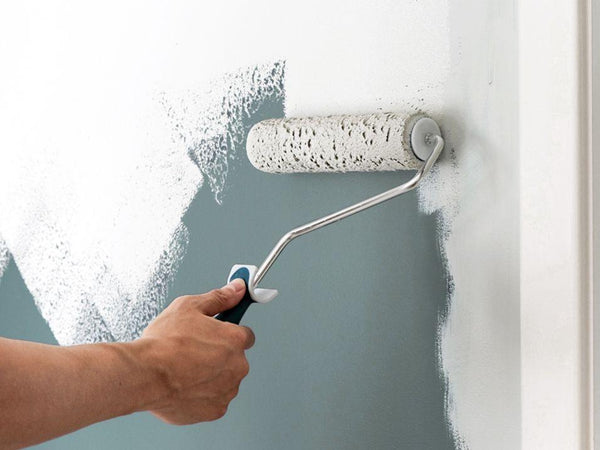
Step 4: Rolling the Ceiling
Now that the edges are done, it’s time to paint the rest of the ceiling:
- Load the Roller: Pour your paint into the tray and load the roller evenly, removing any excess to prevent drips.
- Use an Extension Pole: Attach an extension pole to your roller to easily reach the ceiling without standing on a ladder.
- Work in Small Sections: Roll in small sections (about 3x3 feet) using a “W” or “M” pattern to ensure even coverage without streaks.
- Apply a Second Coat (If Needed): After the first coat has dried (typically 4-6 hours), apply a second coat for full coverage and a streak-free finish.
Step 5: Inspect and Finish
Once the ceiling is painted, inspect for any missed spots or uneven areas:
- Check for Streaks: Look for any areas where the paint may have dried unevenly. Touch up with a roller if needed.
- Remove Painter’s Tape: Carefully remove the tape while the paint is still slightly damp to avoid peeling.
Tips for an Even and Streak-Free Finish
- Choose a Flat or Matte Finish: These finishes hide imperfections and minimise light reflection, making streaks less visible.
- Use a Medium-Nap Roller: For most ceilings, a 3/8-inch nap roller provides the best coverage without adding too much texture.
- Keep a Wet Edge: Always roll into a wet edge to avoid overlapping dry paint, which can lead to streaking.
Recommended Products
For achieving a smooth, streak-free ceiling, we recommend the following products from PaintOutlet.co.uk:
- InsOpaint Ultra: Adds insulating benefits to your ceiling and helps regulate temperature.
- HQC Matt Emulsion: Provides a smooth, matte finish ideal for ceilings.
- HQC Stabilising Universal Primer: Perfect for priming ceilings with stains or uneven textures.
FAQ Section
Q: How can I avoid streaks when painting a ceiling?
A: To avoid streaks, always roll into a wet edge, use consistent pressure, and opt for a flat or matte finish. Working in small sections and maintaining a wet edge helps create a smooth, streak-free finish.
Q: How many coats of paint do I need for a ceiling?
A: Most ceilings require two coats for full coverage and an even finish, especially if you’re covering a darker colour or previously stained surface.
Q: What’s the best type of paint for ceilings?
A: Flat or matte paints are best for ceilings, as they hide imperfections and provide a smooth, even appearance.
Conclusion
Painting a ceiling can be straightforward with the right preparation and tools. By following this guide and using high-quality products from PaintOutlet.co.uk, you can achieve a streak-free, professional-looking ceiling that enhances your space. Whether you’re refreshing a room or tackling a new project, these steps will ensure an even, long-lasting finish.
Shopping with PaintOutlet helps you save paint waste, money, and time while using the highest quality paints and products made in-house. We are on a mission to reduce carbon emissions and prioritise environmental sustainability over profit.